Grilled cheese is supposed to be comforting. Warm bread. Melted cheese. Simple, familiar, reliable. But after a while, it starts tastig flat.
Not bad just predictable. That’s where this swicy honey version comes in. It doesn’t change what grilled cheese is. It sharpens it. A little heat, a little sweetness, and suddenly the sandwich wakes up. Same ingredients you already buy. Same pan. Very different result.
Time Breakdown
What This Is And Isn’t
This is not a gourmet grilled cheese or a chef-style reinvention. There’s no special equipment, no infused oils, and no fancy cheeses you have to hunt down.
It’s the American home-kitchen version fast, forgiving, and built around familiar grocery items. The goal isn’t complexity. It’s contrast. The honey doesn’t turn the sandwich sweet, and the heat doesn’t overpower the cheese. Everything stays balanced.
Ingredient Snapshot
- 2 slices sandwich bread
Soft white or standard sandwich bread browns evenly and keeps the filling balanced. - 2–3 slices cheese (about 1/2 cup shredded)
American melts smoothly, cheddar adds flavor. Using both is common and dependable. - 1–2 teaspoons butter
Enough to coat the bread lightly so it toasts golden without soaking through. - 1 teaspoon honey
Adds gentle sweetness without turning the sandwich sugary. - 1/4 teaspoon chili flakes or 1/2 teaspoon hot sauce
Just enough heat to cut through the cheese and butter.
Before cooking begins, the following technical standards define the temperature, heat, and storage limits used throughout this recipe.
Technical & Safety Reference
| Technical Variable | Requirement / Standard | Source Framework |
|---|---|---|
| Cooking heat level | Medium-low stovetop heat for controlled browning and full cheese melt | Culinary science (heat control) |
| Surface browning threshold | Bread browned gradually without burning before cheese fully melts | Culinary science (fat + starch interaction) |
| Cheese melt behavior | Cheese must be fully melted before service; no partial melt | Culinary science (dairy melt standards) |
| Reheating constraint | Reheat only on low stovetop heat; avoid microwave reheating | Food safety & quality guidelines |
| Refrigerated storage duration | Up to 1 day when wrapped and refrigerated | U.S. food safety frameworks |
| Room-temperature holding limit | Discard if left out more than 2 hours | USDA-aligned food safety guidance |
| Measurement system | U.S. customary units only | U.S. culinary standards |
Why It Works
Grilled cheese is built on fat and salt. Adding honey introduces a gentle sweetness that highlights those flavors rather than masking them. The heat does the opposite it cuts through the richness so the sandwich doesn’t feel heavy.
When sweetness and heat are used in small amounts, they amplify savory foods instead of competing with them. That balance is what keeps this sandwich from tasting like a novelty.
Step-by-Step Method
1. Butter the bread
Spread 1–2 teaspoons butter evenly over one side of each bread slice. The butter should form a thin, continuous layer without clumps or bare spots. This coating controls how the bread browns and prevents dry patches. Buttering only the outside keeps the interior soft while allowing the surface to crisp evenly in the pan. If the butter is too cold, let it soften briefly so it spreads without tearing the bread.
2. Layer the cheese
Place the cheese between the unbuttered sides of the bread, keeping it centered and away from the edges. Even layering matters stacked or uneven cheese melts inconsistently and can spill before the bread finishes browning. Using a mix of American and cheddar helps balance meltability and flavor. The goal is a uniform layer that softens at the same pace the bread toasts.
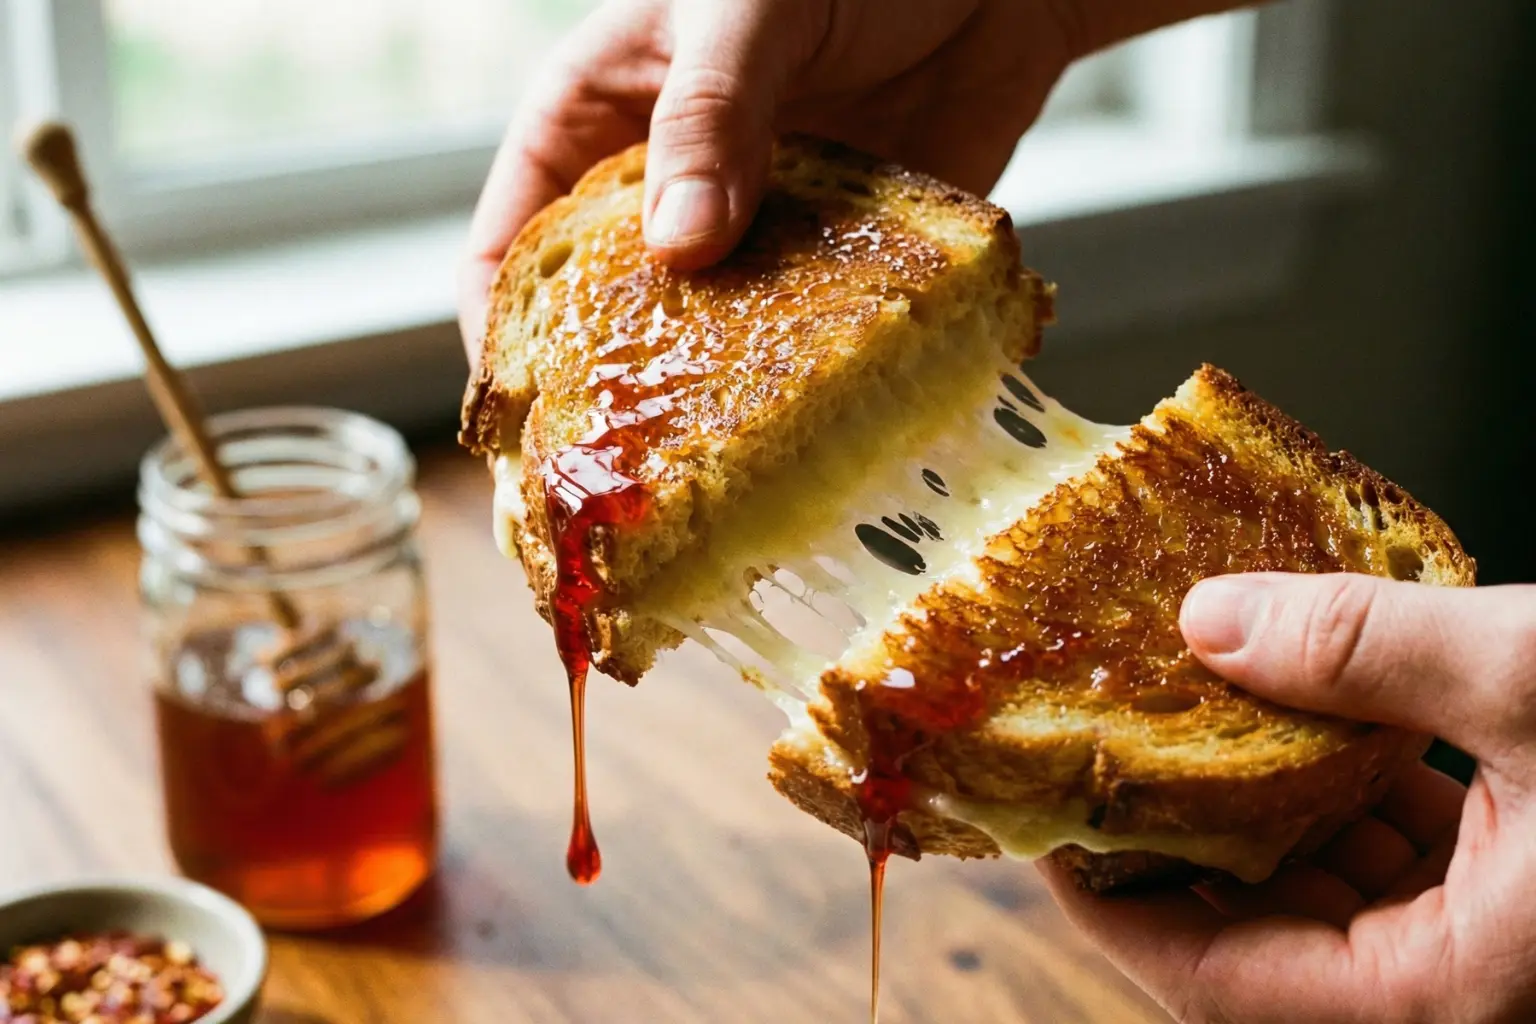
3. Add the swicy element
Drizzle 1 teaspoon honey lightly over the cheese, then add 1/4 teaspoon chili flakes or 1/2 teaspoon hot sauce. Distribute both sparingly and evenly. The honey should disappear into the cheese as it melts, not pool or drip. The heat should register gently, not dominate. This step works best when restrained the contrast enhances the cheese rather than changing the sandwich’s core flavor.
4. Cook low and steady
Place the sandwich in a skillet over medium-low heat. This temperature allows the bread to brown gradually while giving the cheese time to melt fully. Cook for 3–4 minutes, watching for a golden surface and softening interior. If the bread colors too quickly, lower the heat slightly. Steady heat prevents burnt bread and under-melted cheese, which is the most common grilled cheese failure.
5. Flip and finish
Flip the sandwich carefully using a spatula, keeping the layers aligned. Cook the second side until equally golden and the cheese is fully melted, another 2–3 minutes. If needed, press gently to encourage contact with the pan, but avoid flattening the sandwich. When finished, the bread should feel crisp, the center should feel soft, and the cheese should stretch slightly when cut.
Common Mistakes to Avoid
- Using too much honey
If the sandwich tastes sweet instead of savory, the balance is off. A drizzle is enough. - Cooking too hot
High heat browns the bread before the cheese melts, leaving the center cold. - Overdoing the spice
This isn’t meant to be spicy. The heat should register, then fade.
Variations (US-Relevant Only)
- Steakhouse-style
Add a thin layer of caramelized onions for deeper savory flavor. - Scampi-inspired
Use garlic butter on the bread instead of plain butter. - Bread-dipping version
Cut the sandwich into strips and serve with extra warm honey for dipping.
Storage, Reheating & Food Safety
Grilled cheese is best eaten fresh, but leftovers can be wrapped and refrigerated for up to one day. Reheat in a skillet over low heat to restore crispness without drying out the cheese.
Avoid microwaving if possible it softens the bread and separates the fat. As with all dairy-based foods, discard if left at room temperature for more than two hours.
How Americans Commonly Use This
This version fits easily into weeknight dinners, quick lunches, or late-afternoon snacks. It pairs naturally with tomato soup, canned chili, or a simple side salad. Many households use it as a way to upgrade a familiar meal without changing shopping habits or cooking routines.
It feels new without feeling unfamiliar which is why it sticks.
Soft And Confident Close
Once you understand how a little sweetness and heat reshape grilled cheese, plain versions start to feel incomplete. Not worse just unfinished. This isn’t about elevating a classic. It’s about tuning it. Same comfort. More dimension. And once it clicks, it’s hard to go back.
Editorial Transparency Statement
This article is research-based and informed by historical culinary references, established food science, and professional instructional standards. It does not rely on personal kitchen testing.
All content in this recipe is independently verified using authoritative and verifiable sources.
Sources used for this recipe:
- Serious Eats: How to Make Grilled Cheese — Instructional logic, heat control, and cheese melt behavior.
- Bon Appétit: How to Make Grilled Cheese — American home-kitchen standards and balance of fat, bread, and cheese.
- Smithsonian Magazine: History of the Grilled Cheese — Historical grounding of grilled cheese as an American staple.
- NYT Wirecutter: How to Make Grilled Cheese — Equipment neutrality and practical cooking logic for home cooks.
- USDA FSIS: Food Safety — Food safety and dairy handling standards (background verification only).
These references ensure the recipe is research-backed, historically accurate, US-centric, and safe for home cooking.
Author