Sheet pan chicken is one of the most dependable weeknight dinner systems in the American kitchen. When structured correctly, it delivers crisp edges, juicy centers, and caramelized vegetables on a single rimmed baking sheet with minimal cleanup.
The method looks simple, but its reliability comes from temperature control, airflow management, thickness alignment, and accurate internal measurement.
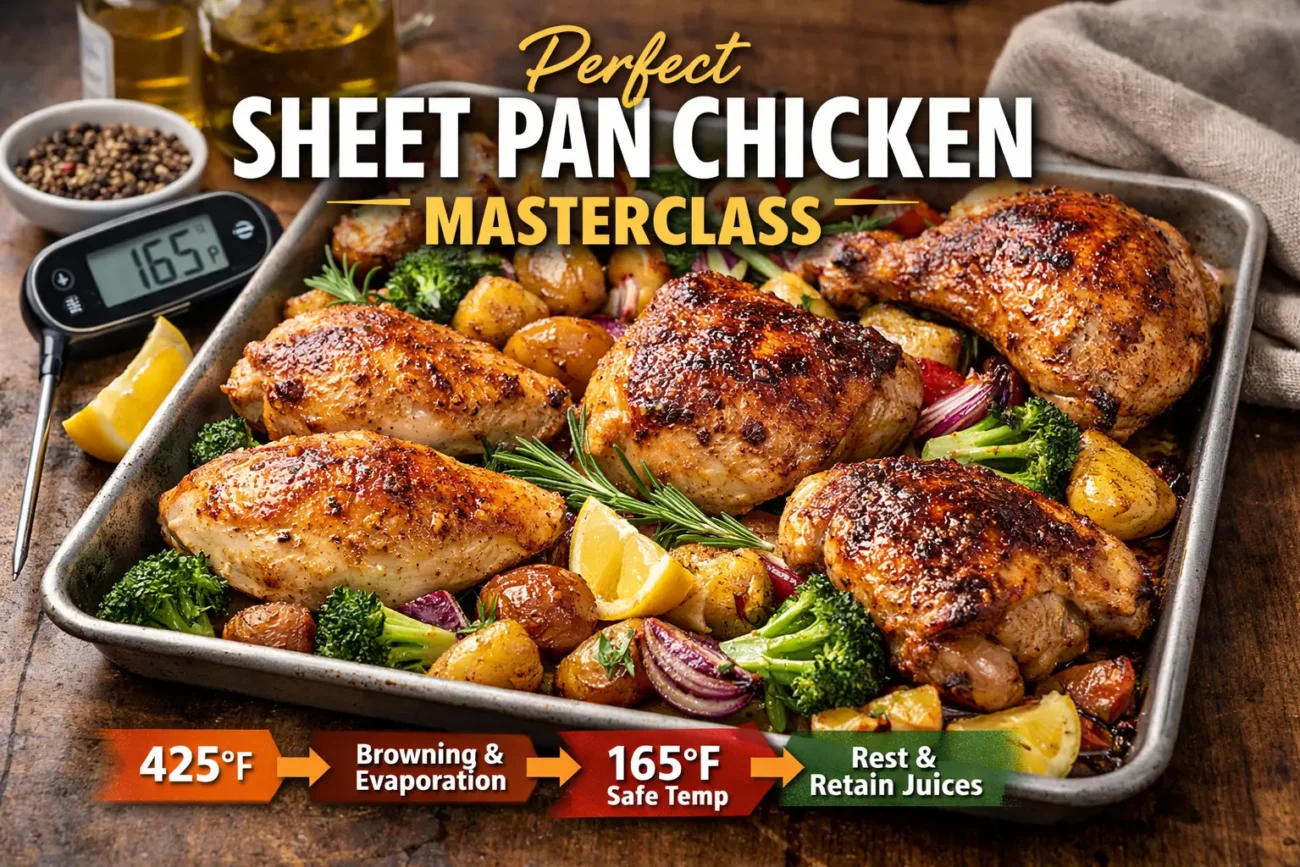
This complete guide explains how to roast chicken at 425°F, why 165°F internal temperature is the only safe doneness marker, how to prevent soggy vegetables, how to improve browning, and how to manage oven heat behavior in residential kitchens.
You will learn timing ranges for chicken breasts, thighs, and bone-in pieces, plus vegetable density alignment and moisture control. When heat, spacing, evaporation, and thermometer verification are controlled together, sheet pan chicken becomes repeatable, not guesswork.
What Is Sheet Pan Chicken?
Sheet pan chicken is a high-heat oven roasting method where chicken and vegetables cook together in a single layer on a rimmed baking sheet. The oven uses circulating hot air, radiant heat, and contact heat from the metal pan to cook food evenly.
Unlike stovetop searing, which relies mostly on direct surface contact, oven roasting surrounds the food with dry heat. This encourages surface browning, caramelization, and moisture evaporation while the interior cooks gently to a safe internal temperature. The goal is simple: crisp outside, moist inside, evenly roasted vegetables, and predictable results every time.
The Method Depends on Four Non-Negotiable Variables:
- Stable oven temperature at 425°F.
- Maintain visible spacing between ingredients.
- Thickness-aware timing.
- Internal temperature verification at 165°F.
When these four elements are controlled together, sheet pan chicken becomes consistent across different ovens, kitchen layouts, and ingredient variations. Remove one variable and predictability declines.
Why 425°F Is the Structural Standard
Most American ovens perform best between 400°F and 450°F. The midpoint, 425°F, creates the ideal roasting environment for chicken and vegetables. It is hot enough to trigger browning and caramelization, yet controlled enough to prevent rapid moisture loss in lean cuts like chicken breast.
At 375°F, cooking extends too long and surface dehydration slows. Above 450°F, exterior darkening can occur before the interior reaches 165°F.
For weeknight dinner efficiency, food safety, texture retention, and balanced oven heat distribution, 425°F remains the structural standard.
At 425°F:
- Surface browning develops efficiently without burning.
- Vegetables caramelize instead of steaming.
- Cooking times remain practical for busy schedules.
- Chicken reaches 165°F before excessive moisture loss occurs.
At this temperature, the oven’s dry heat environment supports evaporation at the surface while preserving interior juices. The Maillard reaction activates, producing golden color and deep roasted flavor. Dense vegetables soften while maintaining structure.
Lean chicken breasts cook quickly yet remain moist when removed precisely at 165°F. This balance between heat intensity and moisture control is what makes 425°F ideal for sheet pan chicken recipes, meal prep systems, and weeknight roasted dinners.
Why 165°F Is the Only Reliable Doneness Marker
The USDA food safety guideline for poultry requires an internal temperature of 165°F. According to the United States Department of Agriculture (USDA) Food Safety and Inspection Service, poultry must reach 165°F internally to ensure destruction of harmful bacteria such as Salmonella and Campylobacter.
This standard applies across all residential cooking methods, including oven roasting at 425°F. This temperature ensures harmful bacteria are destroyed. Visual cues such as clear juices, firm texture, or golden color cannot confirm safety.
A digital instant-read thermometer inserted into the thickest portion of the meat provides the only reliable measurement. Time ranges vary based on thickness, oven calibration, and airflow, so minutes alone cannot guarantee doneness.
Removing chicken exactly at 165°F preserves moisture while ensuring safe consumption. Cooking beyond that temperature increases dryness, especially in boneless skinless chicken breasts. Precision measurement eliminates guesswork and protects texture quality.
The Master Method for Sheet Pan Chicken
The master method is a repeatable system, not a single recipe. Roast chicken and vegetables at 425°F on a light-colored rimmed baking sheet. Maintain even spacing to promote airflow and prevent steaming. Cut vegetables according to density so they cook in alignment with protein timing.
Apply oil evenly to enhance browning and reduce sticking. Insert a thermometer before estimated completion and remove chicken at exactly 165°F. Rest briefly before slicing. When this structure is followed, variations in seasoning, sauce, or vegetable selection become modular rather than risky.
Sheet Pan Chicken Structural Framework
A repeatable roasting sequence that links heat behavior, browning, safe doneness, and moisture retention.
425°F Dry Heat ↓ Surface Evaporation ↓ Maillard Browning (300–350°F Surface) ↓ Internal Temperature Reaches 165°F ↓ 5-Minute Rest ↓ Moisture Redistribution & Texture StabilityThis framework explains why sheet pan chicken succeeds: evaporation enables browning, browning builds flavor, precise internal temperature ensures safety, and resting preserves moisture.
Step 1: Select and Prepare the Chicken
Choose uniform pieces to ensure even cooking. Thickness matters more than weight. Pat chicken dry to remove surface moisture before seasoning. Trim excess fat if necessary. If one end is significantly thicker, gently pound to create even thickness. Structural uniformity reduces uneven doneness and supports accurate timing at 425°F.
Boneless Skinless Breasts
- Lean and timing-sensitive protein.
- Ideal thickness: ¾ to 1 inch.
- Typical cook time: 18–25 minutes.
- Requires precise thermometer monitoring.
Boneless skinless chicken breasts contain little fat, making them more vulnerable to overcooking. Even small temperature overshoots reduce moisture retention. Pounding thicker ends to uniform thickness improves even heat penetration.
Begin checking internal temperature 3–5 minutes before the estimated finish time. Removing at exactly 165°F ensures juicy texture, especially in meal prep applications where reheating may occur later.
Boneless Skinless Thighs
- Higher fat content than breasts.
- More forgiving at high heat.
- Typical cook time: 22–30 minutes.
- Slightly irregular shape.
Boneless thighs contain intramuscular fat and connective tissue, which moderate moisture loss. They tolerate slight timing variation better than breasts. However, thermometer verification is still essential.
Insert the probe into the thickest portion to confirm 165°F. Thighs are ideal for sheet pan dinner recipes because they reheat well and maintain texture during storage.
Bone-In Thighs and Leg Quarters
- Require longer roasting time.
- Bone slows heat penetration.
- Typical cook time: 30–45 minutes.
- Skin benefits from dry heat exposure.
Bone-in pieces cook more slowly because bone alters heat distribution. Insert the thermometer away from bone contact to avoid false readings. Skin-on pieces should remain skin-side up to maximize crisping.
Bone-in cuts provide flavor depth but demand disciplined temperature verification to prevent undercooking or uneven roasting.
Step 2: Preheat Fully to 425°F
Full preheating ensures immediate surface dehydration and proper browning. Placing food into a partially heated oven delays the Maillard reaction and extends exposure time, increasing moisture evaporation.
Allow the oven to reach 425°F before inserting the sheet pan. Use an oven thermometer if calibration is uncertain. Stable oven temperature supports consistent roasting results and predictable cook times.
Step 3: Oil and Season Strategically
Apply a light, even coating of oil to chicken and vegetables. Oil improves heat transfer, enhances browning, and prevents sticking. Avoid excess pooling, which can encourage steaming. Distribute salt evenly for balanced flavor.
Dry spices such as paprika, garlic powder, onion powder, thyme, and black pepper tolerate high heat well. Add sugar-based glazes during the final 10–12 minutes to prevent burning.
Step 4: Arrange for Airflow
Place chicken and vegetables in a single layer with visible space between pieces. Overcrowding traps moisture, lowers surface temperature, and reduces browning efficiency.
If necessary, use two sheet pans. Maintain visible spacing so heat can circulate freely and prevent steam accumulation, allowing caramelization instead of sogginess.
Step 5: Align Vegetable Density With Chicken Timing
Vegetables cook at different rates based on density and water content. Cut size controls timing more than type. Align denser vegetables with longer-cooking cuts and add high-water vegetables later if needed. Structural timing alignment prevents undercooked potatoes or over-soft zucchini at service.
Dense Vegetables (Longer Roast Time)
- Russet potatoes.
- Sweet potatoes.
- Carrots.
- Butternut squash.
Dense vegetables require longer exposure to high heat. Cut into uniform one-inch pieces to support even roasting. When paired with bone-in chicken, they can roast simultaneously at 425°F.
For faster-cooking cuts like boneless breasts, consider pre-roasting dense vegetables for 5–10 minutes before adding chicken. Proper spacing prevents steaming and supports caramelized edges with tender interiors.
Medium-Density Vegetables (Aligned Timing)
- Broccoli florets.
- Brussels sprouts.
- Cauliflower.
- Green beans.
Medium-density vegetables typically roast in alignment with boneless thighs or moderate-thickness breasts. Ensure cut size consistency to prevent uneven browning.
Toss lightly in oil and arrange without overlap. At 425°F, these vegetables caramelize effectively while retaining structure. They are ideal for balanced sheet pan dinner combinations.
High-Water Vegetables (Quick Cooking)
- Zucchini.
- Bell peppers.
- Cherry tomatoes.
- Yellow squash.
High-water vegetables release moisture quickly. Cut slightly thicker or add during the final 10–15 minutes when roasting thicker cuts. Excess moisture can suppress browning, so spacing is critical. These vegetables contribute freshness and color but require careful timing management for optimal texture.
Step 6: Roast Without Disturbing
Once the sheet pan enters the oven, allow roasting to proceed without frequent door opening. Each opening lowers oven temperature and interrupts browning momentum.
Stable heat supports moisture evaporation and even cooking. Rotate the pan only if your oven has known hot spots. Avoid flipping chicken unnecessarily; consistent top exposure promotes balanced browning.
Once in the Oven:
Maintain stable heat and avoid moisture trapping. Do not crowd or shift ingredients. Allow surface dehydration to develop. Open the oven only when checking internal temperature.
Minimal disturbance ensures efficient browning and consistent roasting performance. These are guidelines. Thickness and oven calibration affect timing. Always verify 165°F internally before removal.
Estimated Timing Ranges:
- Boneless breasts: 18–25 minutes.
- Boneless thighs: 22–30 minutes.
- Bone-in thighs: 30–35 minutes.
- Leg quarters: 35–45 minutes.
Step 7: Verify Internal Temperature
Insert a calibrated digital thermometer into the thickest portion of the largest piece. Avoid bone contact. Begin checking several minutes before estimated completion.
Remove chicken immediately at 165°F to prevent overshooting. Accurate measurement ensures food safety, moisture retention, and predictable results across different ovens.
Do Not Rely On:
Surface color, juice clarity, or cook time alone. Only a thermometer reading of 165°F confirms safe doneness and prevents dryness from overcooking.
Step 8: Rest Before Slicing
Allow chicken to rest for five minutes before slicing. Resting permits internal juices to redistribute throughout the muscle fibers. Cutting immediately releases moisture prematurely.
Carryover heat may raise temperature slightly after removal, reinforcing why exact removal at 165°F is critical. Resting protects texture integrity and improves final presentation.
Chicken Cut Intelligence at 425°F
Understanding structural differences between chicken cuts improves timing accuracy. Breasts cook quickly but dry easily. Thighs tolerate heat better due to fat content.
Bone-in pieces require longer exposure because bone alters heat distribution. Thickness, not weight, drives cook time. Aligning cut selection with vegetable density supports efficient roasting.
Sheet Pan Chicken Cooking Time Comparison at 425°F
Different chicken cuts respond differently to high-heat roasting at 425°F. Cooking time, moisture tolerance, and risk of overcooking vary based on fat content and bone structure. This comparison table clarifies what to expect from each cut so you can manage timing more precisely and avoid dryness.
| Cut Type | Typical Time at 425°F | Moisture Tolerance | Overcooking Risk |
|---|---|---|---|
| Boneless Breast | 18–25 minutes | Low | High |
| Boneless Thigh | 22–30 minutes | Moderate | Medium |
| Bone-In Thigh | 30–35 minutes | High | Low–Moderate |
| Leg Quarter | 35–45 minutes | High | Low |
Time ranges are guidelines, not guarantees. Always confirm doneness by removing chicken at an internal temperature of 165°F for safe and consistent results.
Boneless Thighs: Fat-Moderated Stability
Boneless thighs provide greater margin for error under high heat roasting. Intramuscular fat reduces rapid moisture loss and enhances flavor.
They remain tender even if slightly above 165°F, though precise removal remains ideal. Their structure makes them suitable for meal prep and reheating. Uniform sizing improves predictable cooking time at 425°F.
Bone-In Pieces: Heat Conduction Awareness
Bone conducts heat differently than muscle tissue, slowing internal temperature rise. Insert thermometers away from bone for accurate readings. Skin-on pieces benefit from dry heat exposure on the center rack. Bone-in cuts offer flavor complexity but require disciplined timing management and airflow control for even roasting.
The Science of Browning and Moisture Control
Browning results from the Maillard reaction, which begins when surface temperatures exceed roughly 300°F. In most home ovens, effective Maillard browning accelerates between approximately 300°F and 350°F at the food’s surface, provided moisture has evaporated.
For this to occur, surface moisture must evaporate first. Overcrowding traps steam, reducing surface temperature and inhibiting caramelization. At 425°F, dry circulating air promotes evaporation while internal moisture remains protected by muscle structure. Oil enhances heat transfer, accelerating browning.
Stable oven temperature prevents fluctuations that disrupt chemical reactions. Proper spacing, surface dehydration, and controlled thickness allow roasted chicken and vegetables to develop golden color, complex flavor, and crisp texture without drying the interior.
Equipment and Heat Behavior
Equipment consistency determines whether sheet pan chicken browns properly or merely dries out. Oven calibration, rack placement, and pan material directly influence roasting efficiency. Many residential ovens run slightly hotter or cooler than displayed settings, which can affect cook time and moisture retention. In fact, U.S. residential ovens commonly vary by ±15°F from their displayed temperature unless recently calibrated.
Using an oven thermometer verifies that 425°F truly means 425°F. Rack placement controls how radiant heat interacts with the sheet pan, while pan material determines how efficiently heat transfers to the underside of the chicken and vegetables.
Stable dry heat encourages surface dehydration, allowing the Maillard reaction to develop flavor and color. Inconsistent heat leads to pale vegetables, uneven browning, or premature moisture loss.
When oven temperature remains steady, airflow is unobstructed, and pan material supports balanced conduction, sheet pan chicken becomes predictable. Precision equipment control transforms roasting from variable to repeatable, supporting long-term reliability in everyday American home kitchens.
Rimmed Baking Sheet
A light-colored aluminum rimmed baking sheet provides ideal heat performance for sheet pan chicken. Aluminum conducts heat efficiently, promoting even underside browning without scorching. The shallow rim contains juices released during roasting while still allowing airflow across the surface.
This balance prevents steam buildup and supports caramelization. Deep roasting pans trap moisture, lowering surface temperature and reducing browning efficiency. Thin, warped pans create hot spots that cause uneven cooking.
A sturdy, flat aluminum sheet ensures consistent heat distribution at 425°F. Reliable pan structure improves texture, supports moisture control, and enhances predictable weeknight dinner performance for cooks everywhere.
Light vs Dark Pans
Light-colored pans reflect more radiant heat, producing gradual, controlled underside browning. They reduce the risk of over-darkening before the chicken reaches 165°F internally. Dark pans absorb and retain more heat, which can accelerate bottom caramelization and potentially cause burning.
While dark pans may increase browning speed, they require closer monitoring. If the underside browns too aggressively, adjust by switching to a lighter pan or repositioning the rack slightly higher.
Understanding pan color helps manage heat conduction and prevent imbalance. Matching pan type to oven behavior improves roasting efficiency and supports evenly browned, well-textured sheet pan chicken.
Rack Position
Rack placement influences how heat circulates around sheet pan chicken. The center rack provides balanced exposure from both upper and lower heating elements, creating even browning and stable airflow. Lower racks intensify bottom heat, increasing caramelization underneath vegetables and chicken.
Upper racks expose food to stronger top-down radiant heat, which can deepen surface color quickly. For most residential ovens, the center rack at 425°F delivers optimal equilibrium between browning and moisture retention.
If uneven cooking occurs, slight rack adjustments can correct imbalance. Proper positioning supports predictable heat flow and consistent roasting performance every time.
Convection Ovens
Convection ovens use internal fans to circulate hot air continuously. This airflow accelerates surface dehydration, intensifies browning, and may shorten cooking time slightly. Because evaporation occurs more rapidly, monitoring internal temperature becomes even more important.
Begin checking the thickest portion of the chicken several minutes earlier than standard timing estimates. Although convection improves caramelization and crisp texture, removal at 165°F remains essential for food safety and moisture control.
If browning develops too quickly, reduce temperature slightly or adjust rack placement. Convection systems enhance efficiency but still depend on disciplined thermometer verification for consistent sheet pan chicken results.
Advanced Structural Troubleshooting
Most sheet pan chicken problems originate from structural imbalance rather than seasoning mistakes. Temperature discipline, visible spacing, uniform thickness, and thermometer accuracy determine success. When ovens are not fully preheated, surface browning slows and moisture loss increases.
Overcrowding restricts evaporation, leading to pale vegetables and soft texture. Uneven chicken thickness creates inconsistent doneness, where thinner sections exceed 165°F before thicker portions finish cooking. Lack of thermometer use often results in overcooking or undercooking.
Correcting these foundational variables resolves nearly every issue. Maintain stable 425°F heat, ensure visible spacing between ingredients, pound chicken to uniform thickness, and verify internal temperature before removal. Structural control transforms roasting into a repeatable system.
Once airflow, heat intensity, and timing alignment are restored, sheet pan chicken regains predictable browning, balanced moisture retention, and reliable weeknight dinner performance in any American kitchen environment.
Dry Chicken
Dry chicken almost always results from exceeding 165°F internal temperature. Lean cuts like boneless skinless breasts are especially sensitive to overshooting. Begin checking with a digital thermometer several minutes before the estimated finish time. Remove the chicken immediately when it reaches 165°F, allowing carryover heat to complete residual cooking.
Ensure the oven is fully preheated so cooking time remains predictable. Avoid extended roasting while waiting for vegetables to finish; instead, align density and timing properly. Resting the chicken for five minutes also helps preserve internal juices. Temperature precision is the primary defense against dryness.
Pale Vegetables
Pale vegetables typically indicate overcrowding or insufficient oven heat. When vegetables overlap, trapped moisture forms steam, lowering surface temperature and preventing caramelization. Increase spacing so hot air can circulate freely around each piece. Confirm the oven is fully preheated to 425°F before roasting begins.
Apply a light, even coating of oil to enhance heat transfer and browning efficiency. Cut vegetables uniformly to prevent uneven cooking. If necessary, divide ingredients between two sheet pans rather than crowding one. Stable dry heat and proper spacing allow natural sugars to caramelize, producing golden color and concentrated roasted flavor.
Uneven Cooking
Uneven cooking often results from inconsistent chicken thickness or oven hot spots. Pound thicker sections gently to create uniform thickness before roasting. This reduces the risk of one end exceeding 165°F while another remains undercooked.
If your oven heats unevenly, rotate the sheet pan halfway through the roasting process. Keep ingredients spaced evenly to promote balanced airflow. Verify doneness in the thickest portion of the largest piece. Structural uniformity supports consistent heat penetration and predictable timing. Addressing thickness and heat distribution resolves most uneven roasting problems quickly and reliably.
Excess Liquid Accumulation
Excess liquid forms when ingredients release moisture faster than it can evaporate. Heavy marinades, overlapping vegetables, or crowded pans trap steam and create moisture buildup. Pat chicken dry before seasoning to remove surface moisture.
Use moderate amounts of oil rather than thick sauces at the beginning of roasting. Maintain visible spacing between pieces to support evaporation. If vegetables are particularly high in water content, add them later in the cooking process.
Stable 425°F dry heat encourages surface dehydration and browning. Managing moisture balance ensures caramelization instead of steaming and preserves ideal sheet pan texture.
Storage, Reheating, and Food Safety
Refrigerate cooked sheet pan chicken within two hours of cooking. Store in airtight containers for 3–4 days. Freeze for up to three months for best texture retention.
To reheat, warm in a 350–375°F oven until heated through. Cover loosely with foil to prevent surface drying. Avoid reheating at 425°F, which may over-dry exterior surfaces.
Because the chicken was previously cooked to 165°F, reheating only requires warming, not re-cooking. Always ensure leftovers reach a safe serving temperature before consumption.
Flavor Architecture Without Structural Failure
Flavor supports structure but never replaces it. Dry rubs perform well at 425°F. Oil-based herb blends enhance browning. Add sugar-based glazes late to prevent burning. Use acid carefully to avoid excess surface moisture that inhibits caramelization. The foundation remains constant: stable temperature, proper spacing, aligned timing, and thermometer verification.
Final Structural Summary
Sheet pan chicken succeeds because of control, not luck. Roast at 425°F for balanced browning and moisture retention. Maintain visible spacing to allow airflow and prevent steaming.
Align vegetable density with chicken thickness to synchronize timing. Insert a digital thermometer and remove at exactly 165°F. Rest before slicing to preserve internal juices.
When oven temperature, airflow, thickness, and internal measurement work together, results become predictable across kitchens, seasons, and ingredient variations. Seasonings and sauces may change, but the structural method remains constant.
Author